There’s something magical about sliding a bracelet onto your wrist and knowing you made it yourself. No need for fancy tools, no stressful instructions, and definitely no high price tag—just a handful of materials, a spark of creativity, and a few minutes of your time. Easy bracelet making is the kind of craft that welcomes everyone, from total beginners to seasoned DIY pros, and the best part? Each bracelet tells your story through colors, textures, and styles.
Whether you’re looking to pass an afternoon with kids, create a thoughtful gift, or simply add flair to your jewelry collection, bracelet making is about having fun while creating something wearable. So, let’s dive into everything you need to know to get started, plus plenty of ideas to keep your imagination buzzing.
Why Easy Bracelet Making is Worth Trying
Sure, you could buy a bracelet from a store, but there’s something extra special about crafting your own. When you make it yourself, you get:
- Personalized Style: Choose the exact colors, charms, and designs that match your personality.
- Affordable Fashion: A few beads and strings cost way less than buying jewelry at a boutique.
- Creative Therapy: Repetitive motions like knotting and stringing beads are surprisingly calming.
- Unique Gifts: Handmade bracelets carry thought and love—perfect for birthdays, holidays, or “just because” moments.
Think of it as fashion mixed with mindfulness. Every knot and bead strung together is like a mini act of creativity you can wear.
The Essential Materials and Tools
Here’s the beauty of easy bracelet making: you don’t need much. Most projects require only a handful of supplies, and you might already have some at home.
- Beads: Glass beads, seed beads, wooden beads, or even recycled ones from old jewelry.
- Cord or String: Elastic cord for stretchy bracelets, embroidery floss for friendship styles, or hemp cord for earthy vibes.
- Charms: Little accents like initials, shells, or pendants add personality.
- Clasps (optional): For more polished designs, though many beginner projects skip them.
- Basic Tools: Scissors, tape, and maybe a dab of jewelry glue.
That’s it! No need for a craft room or expensive gear. A small box of supplies can unlock endless bracelet possibilities.
Easy Bracelet Styles to Try
The fun begins with picking a style that excites you. Here are some beginner-friendly favorites:
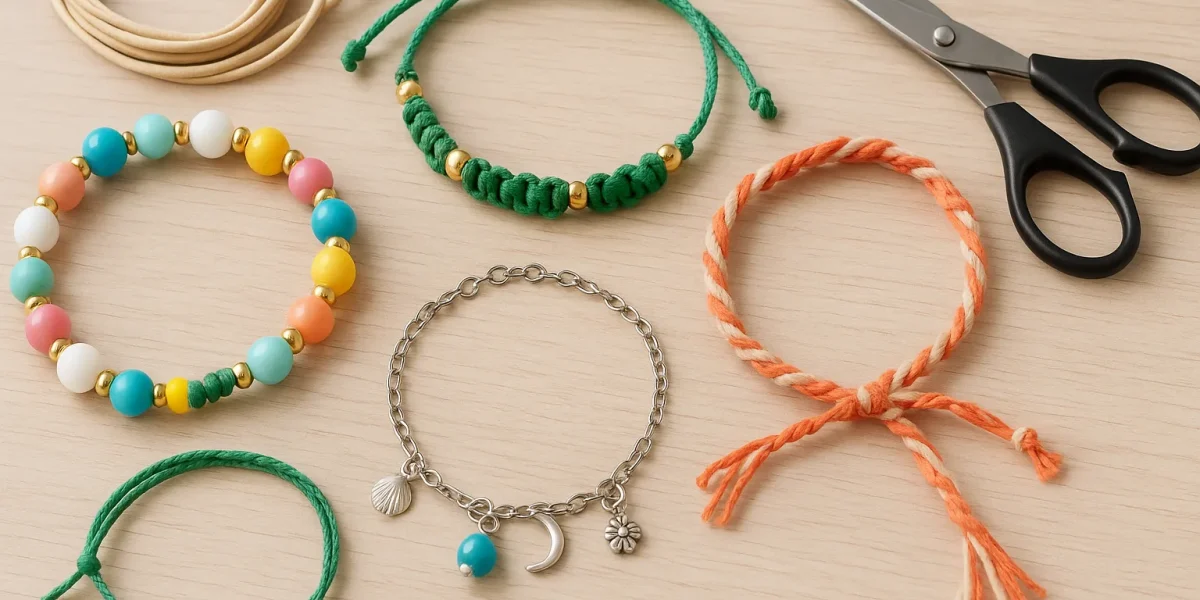
1. Beaded Stretch Bracelets
The easiest of all—you simply string beads onto an elastic cord, tie it off, and voilà. Perfect for kids and adults alike.
2. Friendship Bracelets
Colorful embroidery floss, simple knotting, and lots of nostalgia. These classics are still trending, and patterns range from simple braids to intricate weaves.
3. Charm Bracelets
Take a simple chain or cord, add charms that mean something to you, and you’ve got a story around your wrist.
4. Macrame Bracelets
A step up in creativity, but still easy once you learn a couple of knots. These have a cool boho vibe.
5. Upcycled Bracelets
Raid your drawer for old buttons, broken necklaces, or fabric scraps, and turn them into something new and stylish.
Each of these can be customized endlessly, so you’ll never get bored.
Step-by-Step: Making a Beaded Stretch Bracelet
Let’s start with the simplest project that anyone can master:
- Measure the Cord: Cut a piece of elastic cord about 4–6 inches longer than your wrist.
- String the Beads: Play around with patterns—alternate colors, add a charm in the middle, or keep it random.
- Test the Fit: Wrap it around your wrist to make sure it sits comfortably.
- Secure the Knot: Tie a double or triple knot tightly. Add a tiny drop of glue for extra hold.
- Trim and Tuck: Snip off excess cord and slide the knot under a bead if possible.
Congratulations—you’ve just made your first bracelet!
Step-by-Step: A Simple Friendship Bracelet
Want something colorful and nostalgic? Try this classic:
- Choose Floss: Pick three or more embroidery floss colors.
- Cut the Strands: Each should be about 30 inches long. Tie them together at one end.
- Secure the Top: Tape it to a table or clip it to a clipboard.
- Start Braiding or Knotting: A basic braid works for beginners, but you can also explore chevrons or stripes with easy tutorials.
- Finish the Ends: Tie a knot, and you’re done!
Friendship bracelets are great for group activities—you can swap them, stack them, and even match colors with friends.
Step-by-Step: Easy Macrame Bracelet
Ready for something a little different? Macrame looks complex but starts with one simple knot.
- Cut Your Cords: One long cord (the base) and two shorter cords (the working cords).
- Anchor It: Tape the cords to a surface so they stay put.
- Square Knot Magic: Bring the left cord over the base, then the right cord over the left, under the base, and through the loop. Tighten. Repeat in reverse.
- Keep Going: Alternate sides until the bracelet is the right length.
- Add Beads or Charms: Slide them in between knots for extra flair.
The result? A laid-back, boho-style bracelet that looks way fancier than it is.
Creative Ways to Personalize Your Bracelets
The beauty of DIY is that no two bracelets have to look alike. Here are a few ways to make them uniquely yours:
- Mix Materials: Combine wood, glass, and fabric for texture.
- Add Initials or Birthstones: Perfect for gifts.
- Try Seasonal Colors: Red and green for Christmas, pastels for spring, jewel tones for fall.
- Go Minimalist or Bold: Tiny seed beads for delicate designs, chunky beads for statement looks.
Your bracelet can reflect your mood, your outfit, or even the season—it’s your personal mini canvas.
Common Mistakes (and How to Avoid Them)
Even easy projects come with learning curves. Keep these tips in mind:
- Don’t cut cords too short—you’ll regret it. Always leave extra.
- Use the right cord thickness for your beads. If it’s too thick, beads won’t fit; too thin, and the bracelet won’t last.
- Double-check wrist size before tying knots. Nothing’s worse than a bracelet that’s too tight.
- Secure your knots! Loose knots are the #1 reason bracelets fall apart.
Bracelet-Making Fun for Everyone
Bracelet making isn’t just for solo crafting—it’s perfect for:
- Kids’ Parties: Set up a bead station and let kids design their own.
- Teen Hangouts: Friendship bracelets never go out of style.
- DIY Gifts: A handmade bracelet is thoughtful without being time-consuming.
- Stress Relief: Crafting while sipping tea or listening to music can be the ultimate relaxation ritual.
Taking It to the Next Level
Once you’ve mastered the basics, you might want to expand your bracelet-making adventure:
- Gift Packaging: Put finished bracelets in tiny fabric pouches or boxes for a polished touch.
- Selling Online: Platforms like Amazon make it easy to share your designs (and maybe make a little extra cash).
- Joining Communities: Online crafting groups or local workshops can inspire new designs and techniques.
Easy bracelet making can be just the beginning of a creative side hustle—or simply a joyful hobby that fills your jewelry box.
Conclusion: Time to Create Your Own
At the heart of it, easy bracelet making isn’t about perfection. It’s about experimenting, having fun, and wearing a little piece of your creativity. With just a few beads or threads, you can make something that sparks joy every time you wear it—or every time you gift it to someone else.
So grab that elastic cord, dig into a pile of beads, and get started. Who knows? Your next favorite accessory might just come from your own two hands.

