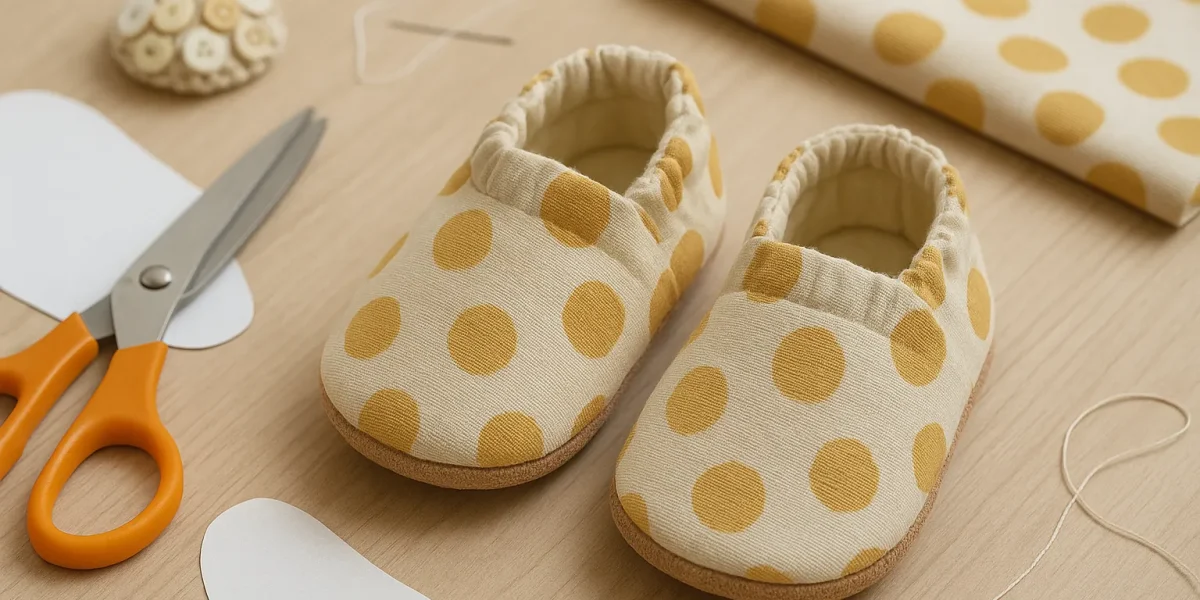
There’s something magical about creating tiny treasures with your own hands—especially when they’re for a little one you love. DIY Baby Slippers aren’t just adorable; they’re practical, affordable, and completely customizable. Whether you’re a seasoned sewist or just starting out, making baby slippers is a project that blends creativity with function. Imagine soft soles cradling tiny feet, fabrics you’ve hand-picked, and designs that perfectly match a baby’s outfit. It’s not just about sewing; it’s about crafting comfort, style, and a personal touch. And yes, DIY Baby Slippers can be surprisingly easy once you know the steps.
This isn’t just a “quick craft” guide. This is your blueprint for making slippers that last, fit well, and look like boutique-quality pieces. By the end of this, you’ll have a step-by-step plan, material insights, safety tips, and even a few design twists to make your slippers stand out.
Choosing the Right Materials
Before you stitch a single seam, you need the right building blocks. Babies have sensitive skin, so materials must be soft, breathable, and non-irritating.
Here’s what works best:
- Fabric: Cotton, fleece, flannel, or soft knit. Avoid anything rough or scratchy.
- Soles: Felt, suede, or soft leather for grip and durability.
- Lining: Plush fleece or soft cotton for warmth and comfort.
- Fasteners: Soft elastic, Velcro, or snaps. No hard edges.
- Thread: High-quality polyester or cotton thread that won’t easily fray.
Pro tip: Prewash all fabrics to prevent shrinkage and remove any chemicals before they touch a baby’s skin.
Tools You’ll Need
Even the most beautiful design can fall apart without the right tools. Here’s your toolkit:
- Sewing machine (optional for faster stitching, but hand sewing works too)
- Fabric scissors or rotary cutter
- Pins or fabric clips
- Measuring tape or ruler
- Templates or printed patterns
- Optional: Embroidery needle, fabric paint, or appliqué materials for decoration
Designing Your Baby Slippers
One of the best parts about DIY Baby Slippers is creative freedom. You’re not stuck with store patterns—this is your canvas.
- Color Palette: Pastels for a gentle, traditional look, or bold prints for a playful vibe.
- Themes: Animals, seasonal patterns, or minimalist chic.
- Personalization: Embroider initials or sew on fabric patches.
- Seasonal Adjustments: Breathable cotton for summer, fleece-lined for winter.
Step-by-Step Guide to Making DIY Baby Slippers
Step 1: Select and Prepare the Pattern
Download a free baby slipper pattern online or sketch your own. Standard baby sizes are:
| Age Range | Sole Length | Sole Width |
|---|---|---|
| 0–3 months | 3.5 in (9 cm) | 2 in (5 cm) |
| 3–6 months | 4 in (10 cm) | 2.25 in (5.5 cm) |
| 6–12 months | 4.5 in (11.5 cm) | 2.5 in (6.5 cm) |
Cut out your paper pattern, making sure to label the sole, upper, and heel sections.
Step 2: Cut the Fabric and Sole Pieces
Lay your fabric flat and pin your pattern pieces down. Use sharp scissors to cut clean edges. Remember to add about ¼ inch seam allowance all around.
Tip: Cut the lining and outer fabric at the same time to keep shapes identical.
Step 3: Assemble the Upper Part
Pin the two upper pieces together (right sides facing). Stitch along the edges, leaving the bottom open. Turn right-side out and press lightly with an iron.
Optional: Add decorative stitching or embroidery now, before attaching the sole.
Step 4: Attach the Soles
With the upper piece inside out, align it with the sole (right sides facing). Pin carefully—this step determines the slipper’s shape. Stitch slowly to curve around the edges without puckering.
For extra grip, sew a layer of suede or non-slip fabric to the outer sole before attaching.
Step 5: Finishing Touches
Turn the slippers right-side out. Add elastic around the ankle for a snug fit or attach Velcro straps. Avoid buttons unless they’re firmly sewn and baby-safe.
No-Sew DIY Baby Slippers Option
Pressed for time or not ready to sew? No problem. Here’s the shortcut:
- Use fleece or felt (they won’t fray).
- Cut pieces using the same pattern.
- Bond edges with fabric glue or fusible bonding tape.
- Add elastic at the ankle by gluing fabric casing over it.
They won’t be as long-lasting as sewn slippers, but they’re perfect for quick gifts or photo props.
Care and Maintenance
To keep your DIY Baby Slippers looking fresh:
- Wash in cold water with mild detergent.
- Air-dry to maintain shape.
- For leather soles, wipe with a damp cloth—avoid soaking.
- Store flat in a cool, dry space to prevent misshaping.
Safety Tips
Babies explore the world with their mouths and feet, so safety is non-negotiable.
- Choose slip-resistant soles for walkers.
- Avoid embellishments that can detach.
- Double-stitch seams for durability.
- Check fit regularly to prevent tightness.
Creative Variations
The beauty of DIY Baby Slippers is how endlessly adaptable they are. Here are some fun variations:
- Animal-Themed: Bunny ears, bear faces, or dinosaur spikes.
- Holiday Styles: Red-and-green Christmas booties, pastel Easter slippers.
- Matching Sets: Create parent-and-baby slipper sets for cozy family photos.
- Upcycled Fabrics: Repurpose soft sweaters, baby blankets, or flannel shirts.
Where to Find Patterns and Inspiration
When creativity stalls, borrow ideas and make them your own.
- Pinterest boards dedicated to baby sewing projects.
- Sewing and craft blogs with free templates.
- Etsy shops offering unique downloadable patterns.
- Instagram hashtags like #DIYSewing or #BabyBooties.
Conclusion
Making DIY Baby Slippers isn’t just about sewing—it’s about crafting something meaningful. Every stitch carries intention, every fabric choice reflects love, and every tiny slipper tells a story. Whether you’re creating them for your own child, as a heartfelt gift, or even as a small business venture, the process is as rewarding as the finished product.
So gather your materials, choose a design that makes you smile, and start stitching. Those tiny feet won’t stay tiny forever—but your handmade slippers will hold the memory long after they’ve been outgrown.

