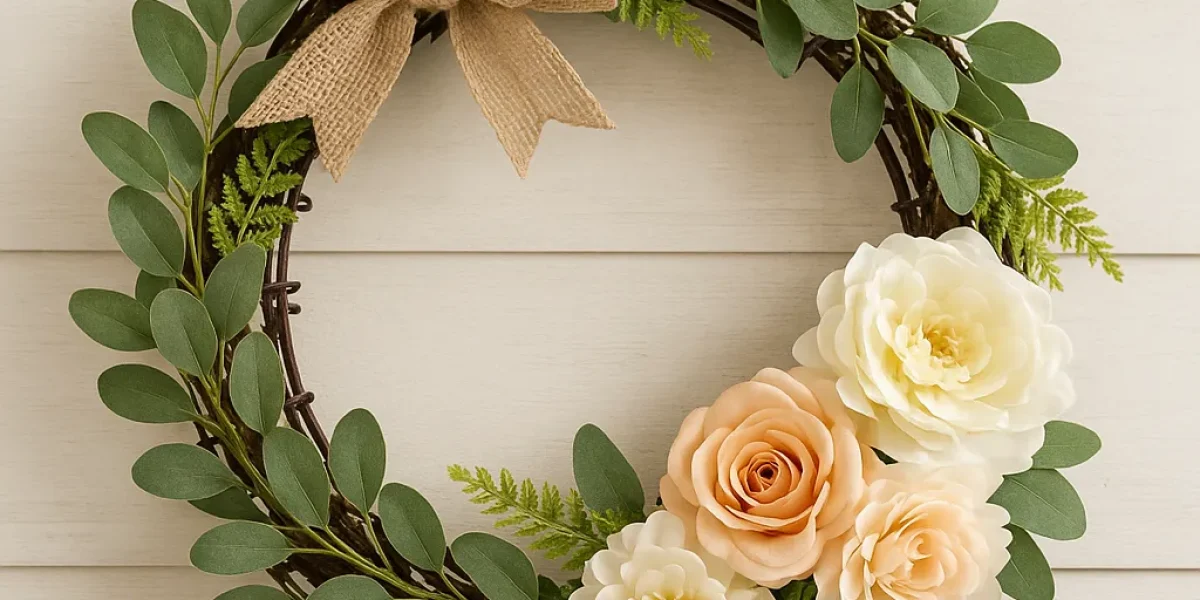
There’s something striking about transforming something forgotten into something beautiful. And that’s exactly what happens when you create a bed spring wreath. Whether you’ve pulled it from a vintage bed frame, found it in a thrift store, or rescued it from your grandparents’ attic, a bed spring wreath is more than just décor—it’s a conversation starter. This upcycled beauty is perfect for rustic, farmhouse, and even modern eclectic styles. And the best part? You can make a bed spring wreath fit any season, any event, and any space. Today, we’re diving deep into everything you need to know—because once you learn how, you’ll want one in every room!
Why a Bed Spring Wreath Works So Well
A bed spring wreath is unconventional, but that’s its charm. It merges texture, dimension, and nostalgia in a way that no store-bought wreath can match. Old bed springs have a natural circular form (or can be bent into one) that makes them ideal for crafting, and their metal structure is sturdy enough to hold seasonal decorations year after year.
Benefits of choosing a bed spring wreath:
- Eco-friendly – You’re repurposing materials that might otherwise end up in a landfill.
- Unique aesthetic – No two bed springs are identical, giving each wreath a one-of-a-kind appeal.
- Durability – Properly treated, metal bed springs last for years without losing shape.
- Year-round versatility – Change the decorations with the seasons, and it never goes out of style.
Materials and Tools You’ll Need
Before you start crafting your bed spring wreath, gather everything you need. Here’s a simple checklist:
| Item | Purpose | Notes |
|---|---|---|
| Old bed springs | Wreath base | Cleaned, rust-free, or sealed for safety |
| Floral wire | Securing décor | Choose green or brown for blending |
| Hot glue gun & glue sticks | Quick adhesion | High-temp works best for metal |
| Greenery | Base coverage | Faux or fresh, depending on preference |
| Flowers | Decorative focal point | Silk flowers are long-lasting |
| Seasonal accents | Theme customization | Pumpkins, shells, ornaments, etc. |
| Wire cutters & pliers | Cutting and shaping wire | A must for manipulating metal |
| Protective gloves | Hand safety | Especially if springs have sharp edges |
Preparing the Bed Springs
You can’t skip this step—prep matters. Old metal often carries dust, rust, and even sharp points. Here’s how to prepare your bed spring for wreath-making:
- Remove debris – Brush off dirt and loose rust with a wire brush.
- Wash and dry – Use warm soapy water, then thoroughly dry to prevent further rusting.
- Seal the metal – A clear spray sealer protects your hands and your décor.
- Shape the spring – If the coil isn’t already circular, gently bend it into shape using pliers.
Pro tip: If you have multiple springs, you can link them together for a larger, clustered design.
Step-by-Step Guide to Making a Bed Spring Wreath
Let’s get into the real fun—the building process.
Step 1: Secure the Base
- Decide if you’re using one spring or several.
- Attach springs together with floral wire if needed.
- Make sure your base is balanced for hanging.
Step 2: Add Greenery
- Wrap faux greenery around the spring, securing it every few inches with floral wire.
- For a fuller look, layer greenery in opposite directions.
Step 3: Incorporate Focal Elements
- Pick 2–3 standout decorations—like a cluster of silk flowers, pinecones, or small pumpkins.
- Secure them in asymmetrical clusters for a modern look.
Step 4: Layer in Seasonal or Themed Accents
- Spring: Bird nests, pastel flowers, tiny eggs.
- Summer: Seashells, driftwood, bright blooms.
- Fall: Mini pumpkins, acorns, golden leaves.
- Winter: Pinecones, ornaments, sprigs of pine.
Step 5: Add the Finishing Touches
- Tie a ribbon at the top or bottom.
- Add a loop of wire at the back for hanging.
- Adjust until everything feels balanced.
Styling Your Bed Spring Wreath for Every Season
One of the best features of a bed spring wreath is its flexibility. You don’t have to make a new one for each season—you can simply swap out the accents.
Ideas by season:
- Spring: Fresh greens, tulips, and soft pink accents.
- Summer: Bold sunflowers, rope or netting, seashell accents.
- Fall: Burgundy flowers, dried wheat, plaid ribbons.
- Winter: Evergreen branches, silver bells, white berries.
Creative Variations for the Bold Crafter
Don’t limit yourself to the typical round wreath style. Here are some creative spins:
- Multiple mini-springs arranged in a vertical line for a door decoration.
- Bed spring centerpiece with a candle or lantern in the middle.
- Wall-mounted floral cascade using the spring as a structural anchor.
- Bed spring chandelier by linking several springs together and hanging with lights.
Display Tips That Make an Impact
The right placement transforms your wreath from “nice” to “wow.”
Where to hang your bed spring wreath:
- Front door as a seasonal welcome piece.
- Over a fireplace mantel as a focal point.
- In a dining room for a cozy, rustic vibe.
- Outdoors on a garden gate for a vintage touch.
When hanging outdoors, make sure it’s protected from direct rain to prevent rust.
Care and Maintenance
A well-made bed spring wreath can last for years if you maintain it properly.
Maintenance checklist:
- Store it in a dry, dust-free location.
- Refresh greenery and flowers if they fade.
- Check metal for rust and reseal if necessary.
- Replace or rearrange seasonal accents to keep it fresh.
Why This Project Is Worth Your Time
A bed spring wreath is more than a craft project—it’s an art piece with history. Each coil has its own story, its own marks, and when you bring it to life with flowers, foliage, and color, you’re creating something truly personal. It’s sustainable, it’s budget-friendly, and it’s a way to express creativity while adding charm to your space.
So, whether you’re an experienced crafter or just starting out, this is the kind of DIY project that’s forgiving, customizable, and incredibly satisfying. And the moment someone asks where you bought that stunning wreath—you get to smile and say, “I made it from an old bed spring.”


