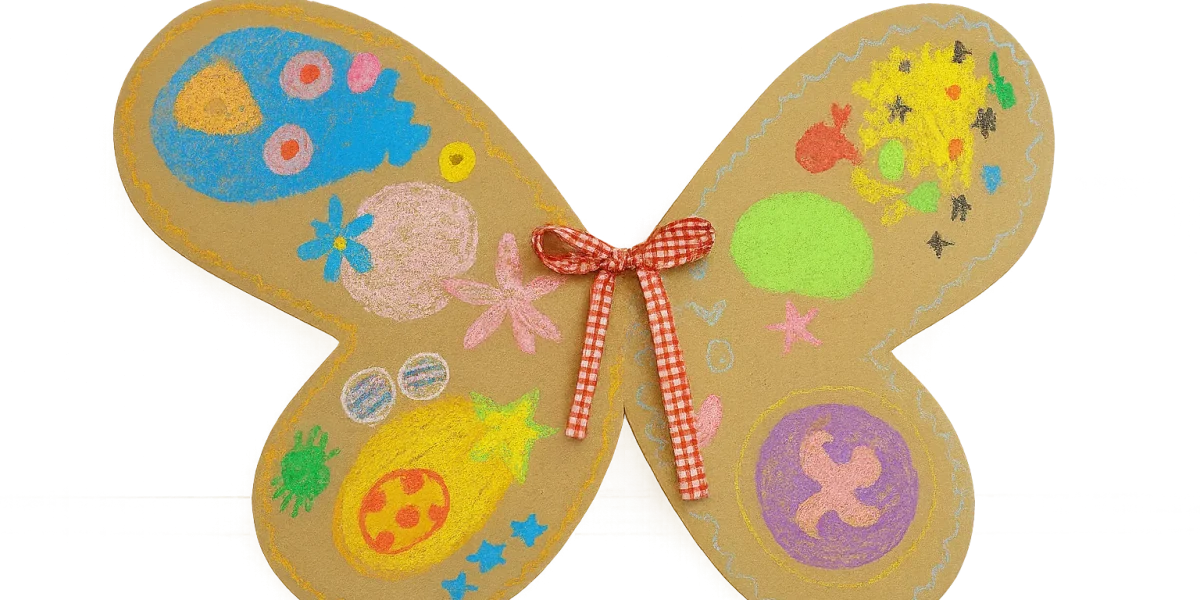
There’s something magical about watching a child flutter around the living room as if they’ve sprouted glorious butterfly wings. The delight in their eyes, the swish of movement, the spark of imaginative play—it’s the kind of joy we want to bottle up forever. That’s why DIY Cardboard Butterfly Wings are such a sweet, accessible project: they’re whimsical, eco-conscious, and simple enough that little hands can help bring them to life.
Let me walk you through how you can make these charming wings, step by step, along with some playful ideas to extend the fun beyond craft time.
Why Make Butterfly Wings from Cardboard?
- Smart upcycling: Most of us have cardboard lying around—leftover parcels, old boxes, or envelope mailers—that make the perfect base for this craft.
- Creativity meets function: Not only do kids get to design and decorate the wings, they’ll also get the joy of wearing them and bringing their creations to life.
- Super-sensory play: Cardboard allows for cutting, folding, gluing, painting—plus, you can introduce colorful cellophane for light-filtering effects and shadow projection.
What You’ll Need
| Item | Why It’s Great |
|---|---|
| Cardboard | One or two large envelopes or flattened boxes work perfectly |
| Ribbon or elastic | To attach wings comfortably around your child’s arms |
| Tape (masking or paper tape) | To hold the wing pieces together securely |
| Cellophane or colored transparent paper | For magical, light-casting panels |
| Glue stick or craft glue | Safe and easy for little artists to use |
| Scissors and craft knife | Scissors for kids, and craft knife for adult-only cutting |
| Pencil, ruler, or measuring tape | To plan the wing size and symmetry |
Step-by-Step: Creating Your Wings
1. Gather Your Materials and Find Your Space
Set aside a clear, well-lit area—maybe your dining table or the floor with newspaper underneath. It’s nice when little ones can cozy into the space and see the pieces come together around them.
2. Measure and Draw Your Wing Shape
Decide how wide and tall you want your wings to be—roughly, maybe around 45–50 cm wide and 35–40 cm tall (a comfy size for toddlers), but you can adjust to fit your child’s frame. Fold a single piece of cardboard in half so you can trace one wing shape on one side. Open it up, cut one wing, then use that as a template to trace the matching half. This ensures symmetry.
3. Cut Out the Wing Shapes
This is where adult help becomes essential. Cut carefully around the outline with scissors or a craft knife. Once both wing halves are cut, you can test-fit or refine curves to get the look just right.
4. Layer and Attach
Take two matching wing cutouts and align them. Sandwich them with the edges together and tape around the outer contours. If you want to add strength or make pockets for light-catching materials, this is a good time to think about layering.
5. Decorate and Add Color
Let the kiddos shine here! They can draw on patterns, paint broad strokes, or carefully fill in shapes. For transparent, glowing sections, cut colored cellophane into shapes and glue them in—as simple or elaborate as they like. Remind them to stay away from the edges so the cellophane holds well.
6. Final Assembly
Once the decorations are dry, glue the two cardboard layers together (if you’ve used separate pieces for decoration). This reinforces the structure and gives a little dimension.
7. Add Straps for Flying
Poke four small, evenly spaced holes in the center—two on each side—just high enough to align with the child’s shoulders. Thread ribbon through the holes and tie them around your child’s arms securely but comfortably. For easier wear, elastic bands can work as well.
Time to Fly (and Learn)
Now comes the best part—watching those wings in action. On cloudy days, they’re still perfect for whimsical dance sessions. But on sunny days? Lay them on the pavement or near a light source, and marvel as colorful, butterfly-shaped shadows glow. It’s a natural, joyful lesson in light, color, and shadow play.
Learning & Development in Disguise
Fine motor skills: Cutting, gluing, and decorating naturally enhance coordination and control.
Color sense & design: Choosing shades, balancing patterns, and experimenting with symmetry nurture early art and math thinking.
Imaginative storytelling: Are these magical wings? Are they garden fairy wings or part of a fantasy play? Encourage storytelling as they flutter.
Eco-awareness: Using recycled materials gently introduces upcycling and environmental stewardship in a fun, tangible way.
Safety & Tips for Parents
- Always handle sharp tools yourself—little hands can assist with coloring and gluing but stay clear of knives and box cutters.
- Opt for child-safe scissors and non-toxic glues and paints.
- If using elastic instead of ribbon, test for comfort and skin safety—elastic may cause rubbing if worn too tightly.
- Toddlers love to climb and run in wings, so supervise to avoid trips or snags.
- Let them help with decoration decisions. Even at tender ages, they often have bright ideas about color and shape that bring the craft alive.
Capture the Memories
These wings are more than a craft—they’re part of a moment. Dress-up sessions, shadow play, or sugary, sunlit photos—capture them in action. Fairy portraits in homemade wings? Pure magic. Preserve them in a scrapbook or display a photo in a “Handmade Moments” frame. They’ll remember these simple joys, and so will you.
Wing Variations and Spin-Off Ideas
- Bigger wings for twinning: Use larger cardboard—you could even make wings to match your child’s favorite animal, like dragonflies or birds.
- Seasonal spin: Autumn leaf wings in earthy tones, sparkly snowflake wings for winter crafting, or rainbow wings.
- Incorporate texture: Use felt, fabric scraps, or even bubble wrap to add tactile interest.
- Lighting magic: Stick lightweight fairy lights along the edge—battery-powered and insulated—for soft glowing wings at dusk.
- Group play: Recruit friends or siblings—you’ll have a whole cast of fluttering creatures in no time.
In Closing
The beauty of DIY Cardboard Butterfly Wings lies in their simplicity and heart. With supplies you’ve already got on hand, you create not just adorable wings, but a world where kids can get into character, tell stories, explore, and imagine beyond the everyday.
These wings are functional art, playful learning, and sweet memory all wrapped into one. So, go raid that recycling box. Clear a little space. Let the pastels, paint, ribbon—and giggles—fly.
Because in fields or living rooms, every child deserves at least one glorious moment of transformation—fluttering joy, homemade wings and all.

